Manage Reverse ETL Syncs
View your sync history, gain insights into sync statuses, and restart or replay failed or partially successful syncs.
Sync overview
On the Reverse ETL sync overview tab for your destination, you can see information about your recent Reverse ETL syncs at a glance, search for recent syncs, and quickly access the mappings and models that power Reverse ETL.
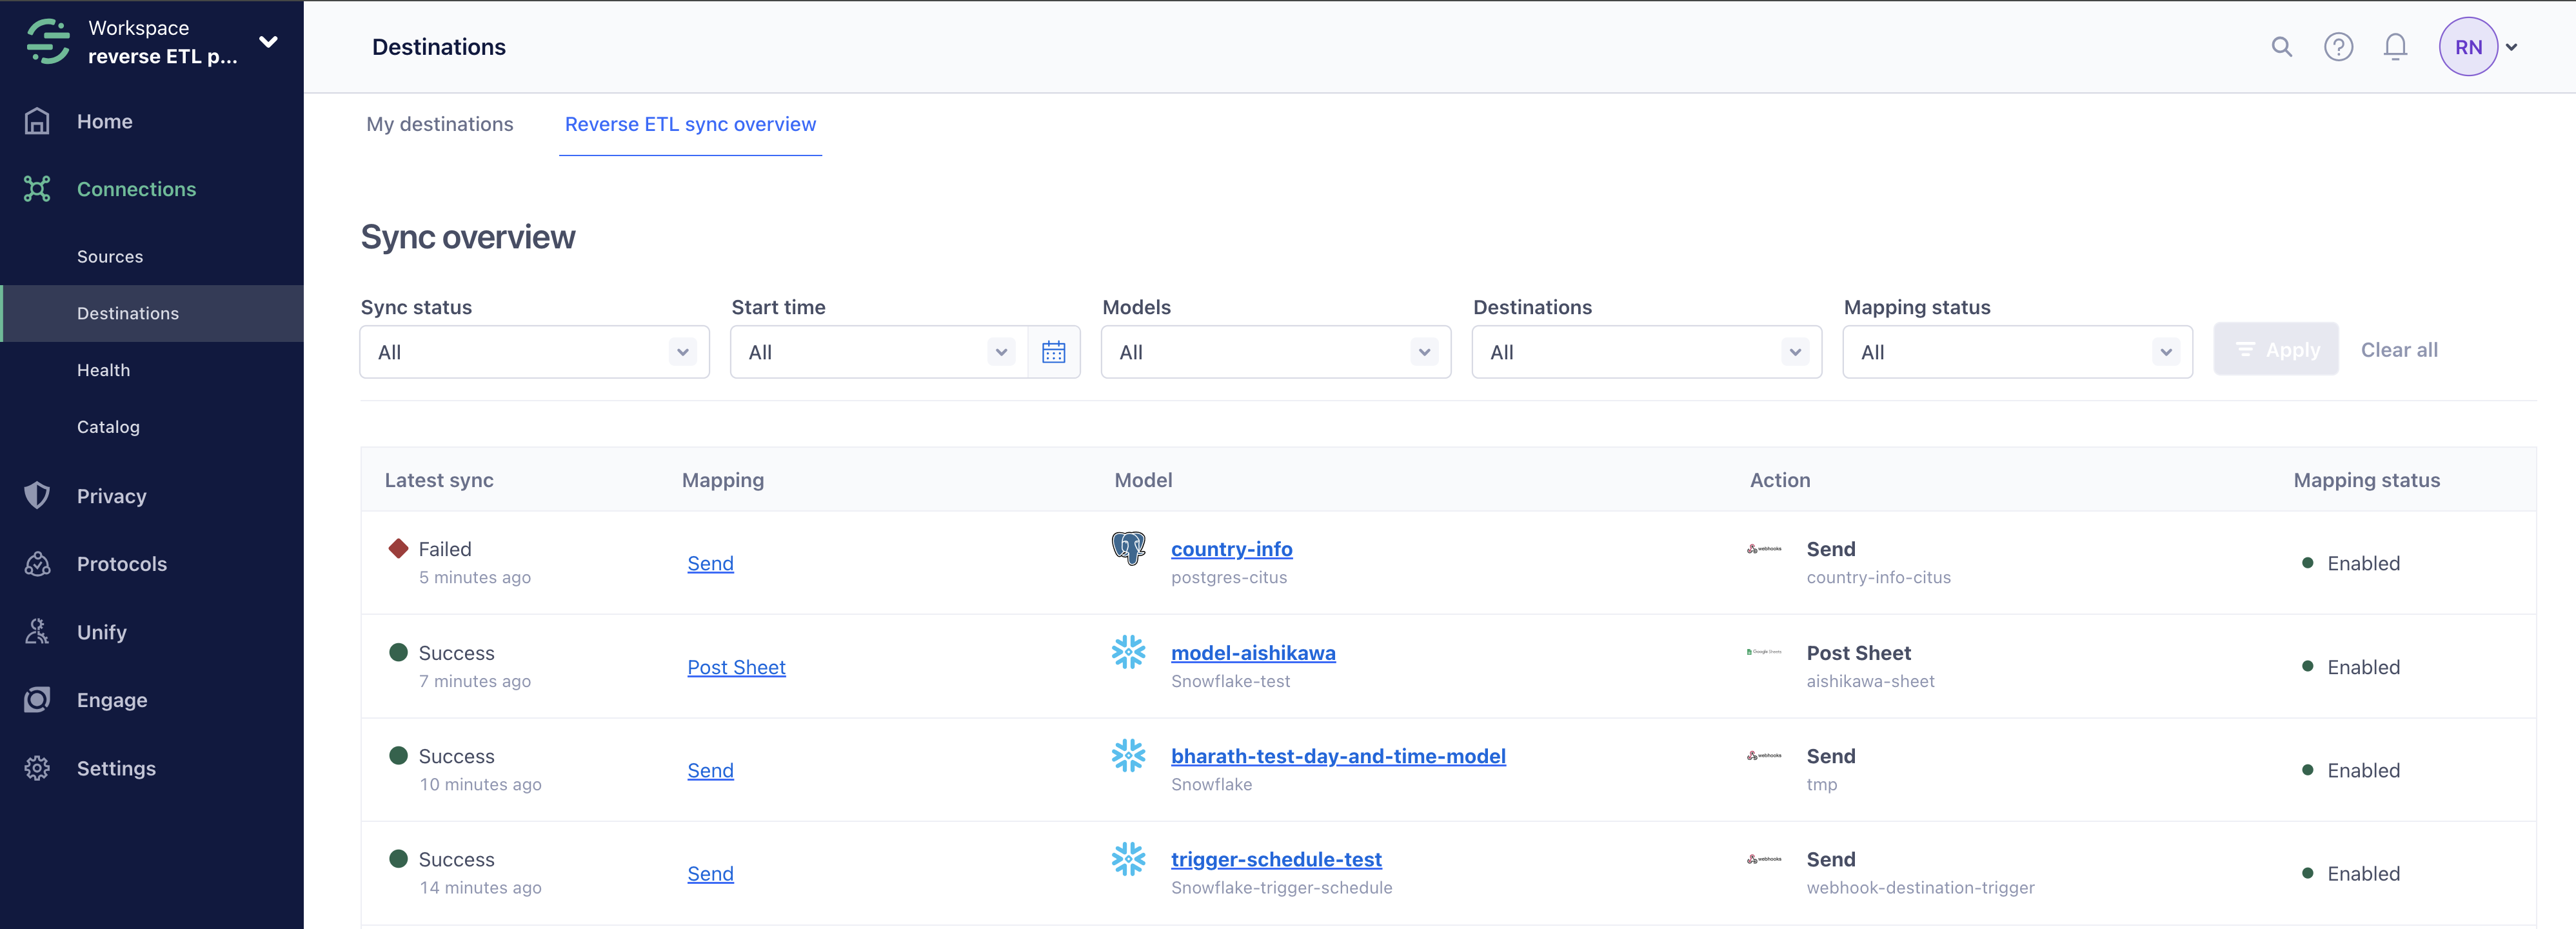
You can view the following information about each sync:
- Latest sync: The progress of your latest sync: syncs can either be In progress, Successful, or Failed. Also included is the timestamp of the sync start time.
- Mapping: The named mapping that powered the sync and a hyperlink to the mapping’s overview page.
- Model: The name that you gave the SQL query used to withdraw information from your warehouse, with a hyperlink to the model overview page. Below the model name, you can see the warehouse source that Segment extracts information from.
- Action: The Action that your destination uses to map information from your warehouse to your downstream destination.
- Mapping status: The status of your mapping: either Enabled or Disabled.
You can also filter the sync overview table to return only the syncs that match your criteria.
You can filter for the following sync attributes:
- Sync status: The status of your sync: In progress, Successful, Partially successful, or Failed.
- Start time: Select a predefined time period, or create a custom date range.
- Model: The model connected to your sync.
- Destination: Select one or more of your connected destinations.
- Mapping status: The status of your mapping: either Enabled or Disabled.
Sync history
Check the status of your data extractions and see details of your syncs. Click into failed records to view additional details on the error, sample payloads to help you debug the issue, and recommended actions.
To check the status of your extractions:
- Navigate to Connections > Destinations and select the Reverse ETL tab.
- Select the destination you want to view.
- Select the mapping you want to view.
- Click the sync you want to view to get details of the sync. You can view:
- The status of the sync.
- Details of how long it took for the sync to complete.
- How many total records were extracted, as well as a breakdown of the number of records added, updated, and deleted.
- The load results - how many successful records were synced as well as how many records were updated, deleted, or are new.
- If your sync failed, click the failed reason to get more details on the error and view sample payloads to help troubleshoot the issue.
Reset syncs
You can reset your syncs so that your data is synced from the beginning. This means that Segment resyncs your entire dataset for the model. During the next sync, all records extracted by the model are sent to your destination, not just the records that changed since the last sync.
To reset a sync:
- Select the three dots next to Sync now.
- Select Reset sync.
- Click I understand what happens when I reset a sync state.
- Click Reset sync.
Replays
You can choose to replay syncs. To replay a specific sync, contact friends@segment.com. Keep in mind that triggering a replay resyncs all records for a given sync.
Alerting
You can opt in to receive email, Slack, and in-app alerts about Reverse ETL sync failures and partial successes.
To subscribe to alerts:
- Navigate to Settings > User Preferences.
- Select Reverse ETL in the Activity Notifications section.
- Click the Reverse ETL sync status that you’d like to receive notifications for. You can select one or more of the following sync statuses:
- Reverse ETL sync failed: Receive a notification when your Reverse ETL sync fails.
- Reverse ETL sync partial success: Receive a notification when your Reverse ETL sync is partially successful.
- Select one or more of the following alert options:
- Enable email notifications: Enter an email address or alias that should receive alerts.
- Enable Slack notifications: Enter a webhook URL and Slack channel name.
- Enable in-app notifications: Select this option to see an in-app notification.
- Click Create alert.
If you opted to receive notifications by email, you can click View active email addresses to see the email addresses that are currently signed up to receive notifications.
Supported object and arrays
When you set up destination actions in Reverse ETL, depending on the destination, some mapping fields may require data as an object or array.
Object mapping
You can send data to a mapping field that requires object data. An example of object mapping is an Order completed model with a Products column that’s in object format.
Example:
    {
        "product": {
            "id": 0001,
            "color": "pink",
            "name": "tshirt",
            "revenue": 20,
            "inventory": 500
        }
    }
To send data to a mapping field that requires object data, you can choose between these two options:
| Option | Details |
|---|---|
| Customize object | This enables you to manually set up the mapping fields with any data from the model. If the model contains some object data, you can select properties within the object to set up the mappings as well. |
| Select object | This enables you to send all nested properties within an object. The model needs to provide data in the format of the object. |
Certain object mapping fields have a fixed list of properties they can accept. If the names of the nested properties in your object don’t match with the destination properties, the data won’t send. Segment recommends you to use Customize Object to ensure your mapping is successful.
Array mapping
To send data to a mapping field that requires array data, the model must provide data in the format of an array of objects. An example is an Order completed model with a Product purchased column that’s in an array format.
Example:
    [
    {
        "currency": "USD",
        "price": 40,
        "productName": "jacket",
        "purchaseTime": "2021-12-17 23:43:47.102",
        "quantity": 1
    },
    {
        "currency": "USD",
        "price": 5,
        "productName": "socks",
        "quantity": 2
    }
    ]
To send data to a mapping field that requires array data, you can choose between these two options:
| Option | Details |
|---|---|
| Customize array | This enables you to select the specific nested properties to send to the destination. |
| Select array | This enables you to send all nested properties within the array. |
Certain array mapping fields have a fixed list of properties they can accept. If the names of the nested properties in your array don’t match the destination properties, the data won’t send. Segment recommends you to use the Customize array option to ensure your mapping is successful.
Objects in an array don’t need to have the same properties. If a user selects a missing property in the input object for a mapping field, the output object will miss the property.
This page was last modified: 29 Aug 2024
Need support?
Questions? Problems? Need more info? Contact Segment Support for assistance!